Tech - Twin Turbo Conversion Tips + Guide
3000GT / Stealth Twin Turbo Conversion Tips & Guide
How to put turbos on your naturally aspirated 6G72 24v DOHC
By Leland Gray
So you have a Stealth or 3000GT, but it's not a twin turbo all-wheel drive. Maybe you've already done some modifications, or maybe you haven't. One thing you know for sure though, is that you wish you had a 3000GT VR-4. Well, here's how you can... at least the twin turbo part.
Last year about this time, I decided to see what would be involved in doing a twin turbo conversion. At the time, there had been only one other person to my knowledge that had done this. There's an old saying that goes "There's more than one way to skin a cat." That's basically what we've got here. There are many ways, many variations, on how to do this. I was one of the first to start planning and collecting all the parts, but as I collected the parts I needed over time, a few others beat me to the punch at actually doing the conversion and getting it running.
Disclaimer: Doing this modification, although not hard, is an in-depth process. You will be taking a lot of parts off your car throughout the conversion, and doing things that could possibly cause harm. While I have had no problems with my conversion, and others the same, there's nothing saying that this is garaunteed not to give you trouble.
Here is a list of parts you'll need. Keep in mind what I said about the many different ways you can go about this, so some of the things on this list you may not need, and some things that aren't on here you might.
Step 1: Getting your car ready
It really doesn't matter how many miles are on your engine, just make sure it's healthy and you've had all the major scheduled service done (60k/120k service). When I did my conversion, I had almost 150,000 miles on my engine. The first thing to do is jack up your car. You will need to jack up both the front and rear, but if you only have one pair of jackstands, just jack up the front for now. Make sure the jackstands are in the proper places, and that the car is sturdy. I don't want to hear of people doing this, and having their cars fall on them because the car wasn't on the jackstands well enough. After your car is jacked up and you're sure it's safe to crawl under, go ahead and drain out the oil and take the oil filter off. While you're under there, drain all the coolant from the radiator as well. Once the radiator is drained all the way, go ahead and pull it out. It sounds like a stupid waste of time, but trust me it'll make things easier later on. You will also need to remove the battery, your intake hose that goes to the throttle body, the battery tray and washer fluid reservoir, and you might as well go ahead and remove the upper intake plenum. Just be careful not to drop any bolts down into the lower intake manifold. That's a bad thing, so I'd cover it up if you're worried about that.
Step 2: Getting water to your turbos
If you hadn't figured it out, the stock TD04 9b/13g turbos that come on the VR-4 are water cooled and also oil cooled. The way water (coolant) gets to the turbos is by way of whats called the 'water housing'. Basically, it's where the thermostat resides, and is what routes coolant through your engine block, through the radiator, and back through the water pump. On the twin turbo models, this is also what feeds the coolant to the turbos. There are two lines going to each turbo. One is a feed line, the other is a return line. What you need to do now is remove your non-turbo water housing and replace it with the water housing off a twin turbo. This can get tedious and tricky, but be patient. You will probably loose more coolant while you're doing this, but don't worry.
Step 3: Feeding your turbos: oil!
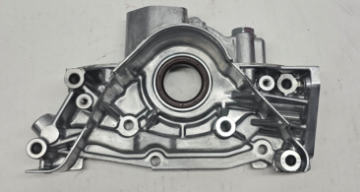
The other thing that your turbos need to survive is oil. This is where the oil housing comes into play. You know where your screw on your oil filter? That's the oil housing. The twin turbo oil housing has a hole for the feed line to the front turbo, as well as the place for the oil cooler lines to hook up to. This is a little trickier, and you're bound to get dirty if your car was like mine and had tons of road grime built up. Unfortunately, the oil housing is not the easiest thing in the world to access. It's under the A/C condensor, which is under the alternator. Before you go any further, you need to take off the A/C belt that goes around the crank pulley. You can do it with the drivers side wheel on, but it might be easier if you just take it off. The first thing you need to do is remove the alternator. Either completey, or just loosen it and pull it out of the way. This is why I had you remove the radiator. Taking the alternator out is a major pain the butt with the radiator still there. Plus it gives you more room to work, regardless. Once the alternator is out of the way, next you need to remove the A/C condensor. Now the A/C condensor will have to stay in the car. Removing it wasn't an option for me, as I didn't know what would happen if I took it out. I also didn't want to have to pay for new refridgerant for the A/C system because I'm sure I would have lost is all. Once that is out of the way, you need to remove the bracket that the A/C condensor is on. Directly behind this bracket lies the holy grail.. the oil housing. It's only held on by three bolts, and it's very simple to swap out the one from the twin turbo with the one that's there. There is a paper gasket there, but I just reused my old one. I'm sure that wasn't the best thing, but I didn't have a new one on me and so far it's doing well. Once you've swapped oil housings, now you get to put back everything that you just took off to get to it.
Step 4: Time to heat things up: the manifolds!
Now you're ready to make some progress. Now is the time where you take off your non-turbo manifolds and put the turbo manifolds on. Be careful when trying to break the nuts loose. On my car I didn't have a problem whatsoever, but others weren't so lucky. Don't be too suprised if a nut gets rounded off or strips one of the studs, but I really doubt you'll run into this. The front manifold is pretty simple. The rear one on the other hand isn't so, since it's back there and hidden. You'll just have to feel around and figure out where the nuts are. It might take some wiggling of the manifolds to free them from where they've been seated for so long. The rear manifold is a little tricky to remove, since the rear motor mount is right in the way. But trust me, it will come off so don't get discouraged. Once the old manifolds are off, bolt on the new ones. Don't forget to install your new manifold gaskets as well. Just a quick note: when removing the front manifold, you might need to unbolt the tube that houses the oil dipstick. I can't remember if I had to or not, but if you do it's only one bolt that holds it in place. You'll actually need to unbolt it later anyway.
Step 5: Time to get blown: putting on the turbos!
May I make one suggestion. Install the oil return lines and coolant lines on the turbos before you install them in the car. I foolishly installed the turbos first, and then intalled the oil lines and coolant lines. It is such a pain, let me tell you. So I came to the conclusion that the only way to go is to put them on the turbos first. So do that, but make sure you know what goes where and so forth. Make sure when you install the turbos that you use both the gasket and the little metal ring that goes in there as well. Not sure what that ring actually does, but I'm sure it serves some purpose since Mitsu put it there. Before you start to install the front turbo, you'll have to switch out the front engine mount. The one on the non-turbo is huge and one piece, and it sits up high. If left in place this would get in the way of the turbo. Actually, more than just get in the way. The front turbo sits right there! So, you need to get the engine mount bracket from a twin turbo. It's two pieces, and sits lower in the engine bay allowing the turbo to reside there. The front turbo easily bolts into place. The rear one is not so easy, but it also bolts in from up top. Also, before you install the turbos, make sure you hook the wastegate actuator arms to the wastegates, and put the little locking pins in place to keep them attached. If you don't do it before the turbos go on, you can forget about doing it with them in the car.
Step 6: Making the connections
Once the turbos are in place, and you're sure they are in for good, now you need to hook up those water and coolant lines. with the coolant lines bolted up to the turbos, it's pretty easy to figure out which line goes to which "port" on the water housing. Get some automotive grade rubber tubing and some hose clamps, and make the connections. It's really hard to get in there to put the hosing in it's place, but work patiently and it will eventually get in there. Once you're done with the coolant lines, next it's time to tackle the oil lines. The front feed line comes from the oil housing you installed. It just screws right in place. There is a bracket on the tube where it bolts also to the same hole that holds the dipstick tube in place. This is why I told you you have to take that bolt out anyways. For the rear feed line, you'll have to get a special adapter. It's called an "engine joint". Basically, it takes the place of the oil pressure switch on the back of the block. The oil pressure switch screws into the end of the "engine joint", and there's an additional outlet where the rear oil feed line screws into. It's not too hard to do, it just takes crawling way up under the car and getting really messy. Now comes the first part when you need to modify your existing parts. The turbo oil pan won't bolt up to the non-turbo block. Everyone had always said this, and I didn't believe them until I tried it myself. Basically I found they were right. So, off to the machine shop I went. First you need to remove the transmission stay brackets that help hold the transmission to the block. You'll also need to remove the drivers side undercarriage support beam, because it's in the way of the oil pan when you go to drop it. Take out all the screws (I think there are like 16) and carefully pry the oil pan away from the block. You have to start at a certain corner of the oil pan. I want to say it is the front corner of the drivers side. Just carefully keep prying until it's loose, and you can pull it down. Once it's out, take it to a machine shop to have it modified to fit the oil lines. If you're good at cutting and welding, you can do it yourself. I'm not, so I had someone do it for me. Once the oil pan is modified, put it back up into place. Don't forget to scrape off all the oil sealant and put new sealant on there before you put it back into place. Have fun with that, because you'll definately get dirty. There's a certain pattern you have to follow when tightening the bolts that hold the oil pan on. I can't remember, but I'll find out and add it to this later. Next you can hook up the oil return lines to the oil pan. Don't forget the gaskets, or else you will leak some oil. For some odd reason, my front oil return line would not line up for anything. I had to have a 1" spacer made for it to work. I still don't know why. The world may never know! Hopefully you don't have this problem.
Step 7: Exhaust
Once you have the turbos bolted in place, and the oil and coolant lines hooked up, and you're sure you're ready to move on, next you need to bolt on the o2 housings and pre-cats. The o2 housing and pre-cat on the rear turbo is all one piece, but two pieces on the front. If you're like me, and are using the non-turbo ECU, you don't need to put the o2 sensors here. Just get some bolts big enough to plug the hole and put them there. I was lucky enough to find a set of JDM o2 housings with no bungs for sensors, and JDM pre-cats that had no cat at all, they're "factory pre-cat eliminators". After you've bolted up the o2 housings and pre-cats, then you can hook up the downpipe to them, and bolt it up to your cat-back exhaust. Keep in mind what year car your pre-cats came off of. 1991-1993 models have different pre-cats than the 1994 and newer models. If you have a 1991-1993 (Gen 1), you need a Gen 1 downpipe. If you have a 1994 and newer (Gen 2, Gen 3, etc) you need a Gen 2 downpipe.
Step 8: Feeding the monster
Now that your turbos are bolted on, the exhaust is ready to go, and the oil lines and coolant lines are all hooked up, you're getting close to being finished! Pat yourself on the back. Next thing to do is to install larger injectors and fuel pump. You'll be just fine using the stock twin turbo fuel pump and 360cc injectors, as that's what I did. Basically, this means taking out the fuel rails with the injectors on them, and swapping out the injectors. It's really simple, and probably the easiest part of the conversion. Just unplug the injectors, pull them out of the fuel rail, and replace them with the larger ones. Be careful with the rubber O-rings, because they do break easily. Also, be careful not to lose the 4 plastic spacers that go between the fuel rails and the lower intake manifold. If you drop one, you may never see it again. After you've installed the injectors and got everything bolted back down again, next we move to the fuel pump. This is a little trickier. The fuel pump is in the fuel tank. Open the trunk, lift up the floor board, and underneath the trunk bin on the right side is the door to the fuel pump. Uncrew the screws, and lift the door. You'll see the top of the fuel pump, which has the electrical connectors, the fuel line, and a little filter thing. Basically, you just pull out the old fuel pump, replace it with the larger one, and put it all back together. There is a link somewhere that has detailed instructions, I'll find it and put it here later.
Step 9 Letting it breathe
Next you need install all the intake piping and intercooler piping. First, put back the upper intake manifold, or simply put "the plenum". You'll need the intercoolers off a twin turbo. They bolt right on, but under the bumper. Luckily, I was in the middle of a bumper conversion when I installed my intercoolers. Otherwise, you'll have to remove your bumper in order to install them. It's kind of a pain, but the only way to do it. My original bumper was that of the Stealth ES. There were no intercooler ducts to feed fresh air to the intercoolers, so I got a bumper from a Gen 1 VR-4. I liked it much better anyways, so it serves both function and appearance. The passenger side intercooler will bolt right up. The drivers side is a different story. On the non-turbos, there is a sheet of metal where on the turbos there is not. This sheet of metal is right where the intercooler piping needs to go. Time to get out the dremel tool! It's very cramped in there, so be careful when cutting away at the metal. Once both intercoolers are mounted, you can run the intercooler piping. Note: the intercooler pipe coming from the rear turbo will not fit around the non-turbo intake plenum without modification. If you use the turbo plenum, you won't have any problems. I decided to keep my non-turbo plenum because it'll keep my low-end torque, so I had to modify the intercooler pipe to fit around it.
Step 10: Before you turn the key
You're pretty much ready to go. But, don't forget some important things. First, unless you already have you need to re-install your radiator. Once that's in and the hoses are clamped down, go ahead and fill up with water/coolant. Don't forget to fill up with oil, too, and put in a new oil filter. You may think you're done. You are, for the most part. This is where it gets important. For one, you need a way to tune your car's fuel mixture. I chose to use the Apex'i S-AFC. It works quite well, and I've been happy with it for awhile now. Secondly, you need a way to monitor your car, and monitor it well. I have a boost gauge, and Air/Fuel ratio gauge, and a dual exhaust gas temperature gauge. The most important out of the lot is the exhaust gas temperature gauge. It tells me when I'm running too lean, too rich, or just right. You never want to run lean, because that spells disaster for your pistons. Also, I have a palm pilot that I have hooked up through the diagnostic port, using the Pocketlogger software. It tells me a lot more than I know how to understand, but using it I can keep track of knock to make sure I'm not running lean and getting rod knock.
This was just a quick write-up on how I did my conversion. I wrote it all from memory in about two hours, so I'm sure I skipped over something or left some things unclear. I'll go back later on and change things around to make it more detailed and easier to understand. I'll also slowly add pictures to it as well so you have a visual reference to go by. If you have any questions, feel free to ask. I'm here to help. If anyone spots something major that I described wrong or left out, let me know too so I can change it so someone doesn't screw anything up.
Leland Gray
leland_gray@hotmail.com
Pictures and updates coming soon!


